
The elbow board is often used as part of a long list of exercises. It is typically fitted at the end of cardiovascular or weight training, in supersets with other abdominal exercises, or as a common way of testing overall strength at the core .
You will not be left with a ” six-pack ” just with the board, but it will help to develop a strong core , which will be a base from which to work.
It is necessary to practice the technique before focusing on the intensity, therefore, invest some time to perfect the form before moving on to the next phase. Getting into fatigue leads to deterioration of the technique and, consequently, to a decrease in the effectiveness of the exercise, therefore, to endure as long as possible is not the absolute goal.

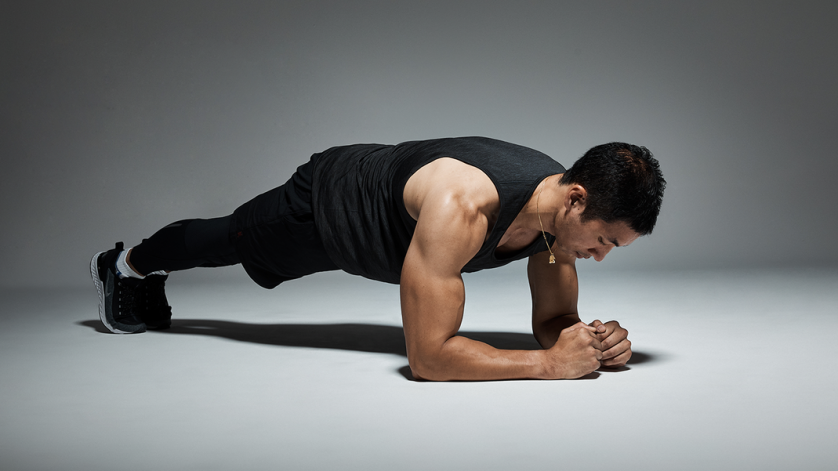
The Plank
Step 1
Staying in the right position from the beginning is the key and, for that, the best way to make the board is slightly counter-intuitive. Lift your hips above shoulder height and then lower them, while contracting your glutes. If at any point your glutes relax, your hips will sag and your back will bend, causing your lower back to support the entire load.
Step 2
After your hips are shoulder-length, shrink your belly as much as possible. This will help to mobilize the abdominals, and in particular the crucially important transversus abdominis, which acts as the body’s natural “corset” and which will help everything to be well collected.
Step 3
Try to relax your shoulders. You should feel the tension in your torso, and perhaps in your buttocks, more than in your shoulders. Keeping your elbows directly below your shoulders will help, so try not to put your body weight back. Doing so will simply fatigue your shoulders.
Step 4
Breathe! A basic but often overlooked thing. Breathing deeply will have a positive influence on your board, both physically and mentally: on inspiration, it will help supply oxygen to the muscles under stress and, on exhalation, it will give you the opportunity to re-focus on mobilizing the transversus abdominis, shrinking the stomach. Focusing on your breath will also distract you from the feeling of the muscles burning, which is a bit like a hot sauce … some people love it, and some people hate it.
Remember that you can always do the board with your knees on the floor, in case you need to lower the intensity.
Frequently Asked Questions
How long should a beginner endure on a board?
This depends entirely on your ability and, frankly, there are no right or wrong answers. If you feel tension in your lower back, it is a sign that you have been on the board for too long: reduce the duration and concentrate on following the steps above. For beginners, we propose a goal of 3 × 30 seconds and, for those who are more advanced, 45 to 60 seconds. For those who can do more than that, we suggest supersets (2 exercises without rest to rest) with another exercise for the abdominals, to provide a variety of movements and intensity.
How effective is the board?
The board is fantastic if your goal is to be better at making the board. But if you want a ” six-pack “, the board alone will be a disappointment. Practicing plank variants is a good way to develop strength in the torso and an excellent addition to any abdominal routine, but make sure you include more specific exercises for the rectus abdominis, if it is really the six-pack What you have in mind.
Is it possible to lose weight with the board?
The short and direct answer is: by itself, no. But if you include plank variants as part of an exercise routine, along with calorie control and healthy eating, then yes, absolutely!
Can we train the board every day?
If you are new to core training, and specifically on the board, you may experience muscle pain the next day, so we would recommend leaving a break of a day or two. As you progress you will be able to increase the frequency, but we still suggest switching between different variants of the board, to provide more variety to the muscles.
Variantes
1. Side board
Reps: hold for 30 – 45 seconds
- With your left elbow directly under your shoulder and your feet resting on your side on the floor, lift your hips until they are aligned with your shoulders.
- Pull your hips slightly forward and contract your abs, shrinking your stomach.
2. Side board with hip thrusts
Reps: 10 – 15 on each side
- Follow the same steps as for a side plank and, after being in the starting position, position your hips slightly below the center line, then raise them just above it.
- A broad movement will make this exercise less effective; a more restricted movement will bring greater intensity to your oblique abs.
3. Side board with rotation
Reps: 10 – 15 on each side
- Follow the same steps as for the side plank, and extend the arm that is not being used for support over your shoulder.
- Keeping your feet and hips fixed, rotate your shoulders towards the floor, bringing your arm below your back without letting it touch the floor.
- Don’t let your hips drop and perform the movement with control, not speed.
4. Board with arms outstretched
Reps: hold for 30 – 45 seconds
- Start the exercise in the same way as for a traditional elbow board
- After you are in the correct plank position, stretch your arms so that your body is resting on your hands, which should be slightly ahead of your head position.
- “Walk” with your hands to position them in front of your head or closer to your shoulders, to adjust the intensity.
5. Plank “walk”
Reps: 8 – 10 per arm (total of 16 – 20 reps)
- Start in the plank position, with your feet about the width of your hips.
- Place your right elbow on the floor, followed by your left elbow.
- Choose your belly and contract your abdominals to minimize the twisting of your hips (which should continue to point downward throughout the movement).
- Returns with the hands to the starting position, first with the right arm, then with the left.
- Repeat this movement, alternating the arm that moves first after each repetition
6. “Stretching” on a board
Reps: 8 – 10 per arm
- After you are correctly in the plank position, slightly move your feet apart until they are shoulder-width apart.
- Stretch one arm forward, while keeping your hips pointing to the floor.
- Switch arms until you reach the end of the repetitions. If you can easily get past 10 repetitions for each arm, try expanding the base board further.
7. Plank “saw”
Reps : 15 – 20
- Position yourself with your elbows directly below your shoulders and your legs straight, with your feet hip-width apart.
- Slide your hands forward until your elbows are aligned with your ears (this will be the starting position)
- Keeping the abdominals active, it makes the body slide forward, using strength from the elbows; then, pull the body back until the elbows are again aligned with the ears.
8. Knee to elbow board
Reps: 8 – 10 for each leg
- From the basic board (on the elbows or hands) go up the right knee towards the elbow on the same side
- Make sure that the knee describes a lateral path to the body, and not below the body. This will provide greater mobilization of the oblique abdominals.
- Maintains the abdominal tension throughout the movement

Final Message
The board can be an excellent exercise, but it can also damage the lumbar area if we are not careful to perfect the technique well before we turn to the question of intensity, time and progression. There are many variants, but not all are worthwhile or even bring benefits, so choose carefully. Listen to your instincts and, if something doesn’t seem to be right, you should stop, check if the technique is correct and then resume.